How to make tweaks.


Saturday 6th May, 2017

LaughingQuoll

The Basics

We all have to start somewhere. So let’s start with our development environment.

To make tweaks you will need to install Theos, a command line based compiling tool which will handle compiling, packaging, and installing our tweaks onto our devices. To install Theos on your iOS, macOS, Linux, or Windows device, please follow this guide.

Once Theos is installed you’re ready to start making tweaks. You will need a good text editor to edit and create the tweak; personally, I recommend Atom. It’s sleek and easy to use compared to others.

It’s a good idea to have some understanding of Objective-C when developing tweaks, but for this series it will be assumed you have little to no experience at all. If you do have some then this should be a breeze!

Theos

Now that you’ve installed Theos, you’re ready to begin using it. Theos lets you easily set up and create projects and it comes with a few essential commands you do need to know.

  1. make package
    1. 1. Make Package will scan your code for errors and then compile your program into our familiar .DEB format. In this format, it’s ready for installation.
  2. make install
    1. 1. This installs your new DEB file on your device. SSH is a great way to do this and you can use SSH over USB or plain old SSH via Wi-Fi, whichever you’re more comfortable with. The default SSH password for iOS root is alpine, and you should consider changing it immediately.

These commands can be combined, and they will be followed in order. For example, make package install will make the package and then install it.


Theos Make Package

Example output of make package in a Theos project.

Headers

Headers are essential when making a jailbreak tweak. It tells the compiler what methods exist and helps prevent errors. It’s used to define methods, properties, and ivars among other things.

In your Theos installation you will need to download and install headers; I got mine here. Once downloaded, place them in the include folder found in your Theos installation.

If you can’t find a header, or you find one but importing it causes errors, you can always opt to create your own headers manually. On the other hand, you must be careful if you choose the manual route to make sure the methods you use are legitimate. If they’re not, you could find yourself booted into safe mode or the tweak simply won’t work as expected.

Here is an example of a home made header:

@interface SomeView : UIView
@property (assign) bool someBool;
-(id)someValueToReturn;
-(void)someMethodToHack;
@end

This header starts off with the @interface declaration, which indicates the object name and its inheritance. Below that the following lines define methods and properties, which can be accessed and modified on demand.

@interface NCMaterialView : UIView {
	unsigned long long _styleOptions;
	_UIBackdropView* _backdropView;
	UIView* _lightOverlayView;
	UIView* _whiteOverlayView;
	UIView* _cutoutOverlayView;
	NCMaterialSettings* _settings;
}
@property (nonatomic,copy) NSString * groupName;
@property (assign,nonatomic) double grayscaleValue;
@property (assign,nonatomic) double cornerRadius;
-(void)setCornerRadius:(double)arg1 ;
-(double)cornerRadius;
-(double)_continuousCornerRadius;
-(void)_setContinuousCornerRadius:(double)arg1 ;
-(void)settings:(id)arg1 changedValueForKey:(id)arg2 ;
-(void)_configureIfNecessary;
-(void)_configureBackdropViewIfNecessary;
-(void)_setSubviewsContinuousCornerRadius:(double)arg1 ;
-(double)grayscaleValue;
-(double)_subviewsContinuousCornerRadius;
@end

An example of a dumped header. This header is for the NCMaterialView class.

Tweaking

To start making a tweak, use the terminal to CD into your projects folder and run the following command: /theos/bin/nic.pl. Next, select Tweak in the list of provided templates and follow the prompts to name and personalize the tweak identifiers. When you’re asked about filter bundles accept the defaults for the rest of the prompts.

Once finished with the steps above, CD into the new project directory. In my example, I’ve called the tweak Test so this is the name I would use for CD.

Now just visit your editor, add the new project folder, and select the Makefile file. Add the following line under the tweak name:

TWEAKNAME_FRAMEWORKS = UIKit

This will make Theos link to the UIKit framework so it knows about UIKit.

Next, open tweak.xm. This is where you would hook a class name using logos methods. To hook a class, use:

%hook ClassName

Under that, you can hook a class method:

+ (id)sharedInstance {
  return %orig;
}

Or you can hook an instance method with an argument:

- (void)messageName:(int)argument {
	%log; // Log all argument values to the system log and any other good stuff.
	%orig; // Call the original function with its original arguments.
	%orig(nil); // Call through to the original function with a new custom argument.
}

You can also hook an instance method with no arguments:

- (id)noArguments {
	%log;
	id original = %orig;
	[original doSomethingDifferent];
	return original;
}

When you’re finished hooking stuff, you can finish your %hook off with %end. This is vital; otherwise you will get errors when compiling.

After you’ve hooked a method, use make package install to compile the tweak and install it on your device.


Theos Make Package

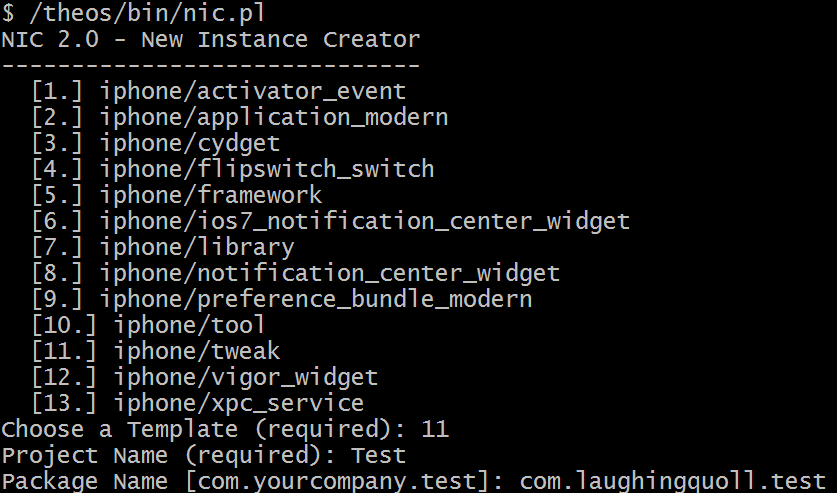
Creating a package using Theos NIC.


Theos Make Package

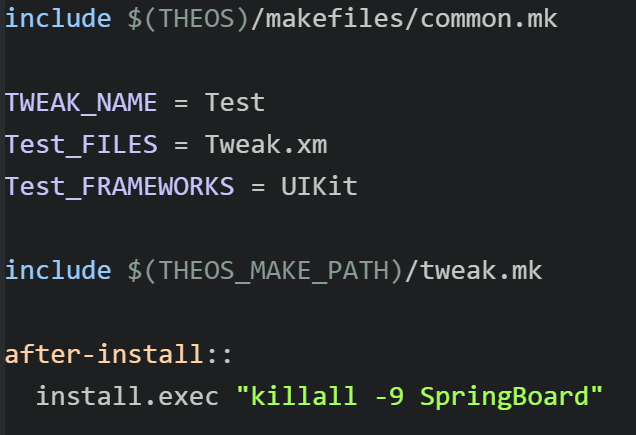
Contents of the MAKEFILE.


Theos Make Package

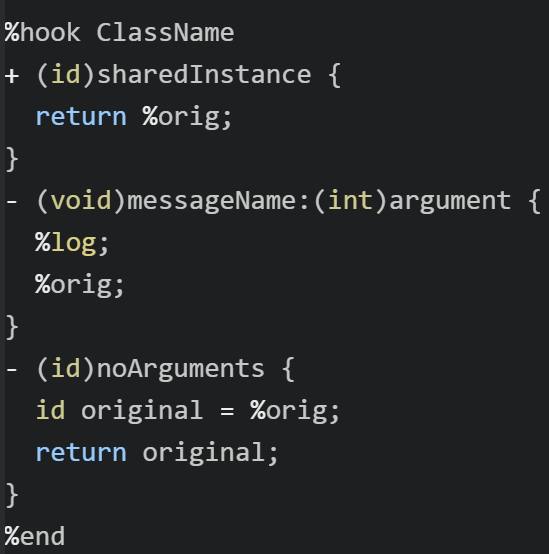
An dummmy example of a complete hook.

Summary

In this tutorial, we went over how to configure a computer for tweak development, and the differences between headers and hook methods. In the next tutorial, we will show you how to make a functioning jailbreak tweak. Stay tuned!

To ensure you don't miss a new tutorial follow me on Twitter @LaughingQuoll.